Monday, July 30, 2012

Love & Hate of Painting Funiture


Last Friday I started painting a couple of chairs that I bought a long time ago.

You see, when I go to thrift stores I keep finding furniture pieces that scream to me, "buy me, and fix me up!" Although, there is absolutely NO room for any more furniture in my house and I have way too many sewing or jewelry projects that I want to do anyways. I can't bring them home.

I have been having an urge to paint some furniture lately. I decided to work on the ones that I have in my house. In the middle of prepping the chairs by sanding them I was already regretting even starting the project. I forgot how much I don't like the prepping part. I really enjoy the actual painting part and the end results. In fact, I am near complete with the chairs. I will share the picture of them soon!

Although my body was achy all over and I was so tired after painting the chairs, I keep thinking about painting the dining tables and the other 6 chairs (6! Ugh, I don't even want to think about sanding them all). Once I start it I have to finish it. My family might not have a table and chairs for a week or so though...

Do you like painting furniture? Are there special tricks and short cuts that you do to prep the furniture? If you do have something up your sleeves, please do share! I am very much interested. :)

Sunday, July 29, 2012

Link Love No.81!

Thanks to those of you who linked up your projects! Ready for my five link-loves for this month?

Have you been frustrated because there aren't many sewing patterns for boys? Look no further. Melissa from Melly Sew has been working hard to come up with an ebook titled "Blank Slate Basics" this summer. Go check out her blog for more details!


So... do you ever feel like you are feeding your kids the same things over and over again? I do. This BLT pinwheel by Scattered Thoughts of a Crafty Mom not only looks great, but when I read the recipe, it made me wanna give it a try! Something like this is so nice; it is something different but not too different for the kids to try. Thank you for sharing!


Flamingo Toes created this ADORABLE coin purse. I love the details on this coin purse as well as the combination of the colors. This will make a perfect gift too!


I have been in love with Union Jack design since forever. This pillows by Sew a Fine Seam caught my eye because it looks a little different than the other Union Jacks I have seen and looks a bit easier to make. So pretty!


Ombre is in! Don't you agree with me? I have seen ombre designs all over the place. Do you want to know how to create your own ombre ribbon? Twigg Studios shared two ways to create a beautiful ombre ribbon on her blog, it is worth checking out!


I hope you will continue to enjoy summer. Happy creating!

Thursday, July 26, 2012

Link Party No.81!

I am so sorry everyone; it totally slipped my mind that I was supposed to have a link party yesterday! I am going to blame that on the busyness of summer... but I have been having fun with my friends and family, that is a good thing right? So please forgive me? :)

I posted a tutorial for Narwhal Pillow that I did for Sarah yesterday; also I did one more pillow for her (the tutorial for that is coming up in August). I have been playing with the leftover fabric from those projects and I am almost ready to share the pictures for those... but today I got none, nada, I mean NO pictures to share.

So, I am counting on you guys to share your awesome creations here at my link party.
Please link up, visit each other and enjoy the party!

1. Please post something YOU made. It doesn't matter if it is crochet, quilt, clothing, anything would be fine. I want to see it! If you use someone's idea or patterns please give them the rightful credit.

2. Link to your specific post, that way it is easier for everybody to find and read it.

3. Please grab the "Tea Rose Home" grab button, and link back from your post. If you can mention the party in your post or place the button on your side bar, that would be great! I want more people to have a chance to come and show off their creation.


Wednesday, July 25, 2012

Out to Sea DIY Blog Tour/ Tutorial~ Narwhal Pillow


I had an opportunity to be a little helper for Sarah Jane at the quilt market this spring. I have been a big fan of her art work for a few years and I was so thrilled when she started designing fabric lines.

I love her new fabric line Out to Sea as much as (well, if not even more than children at Play . I love the color scheme of the collection, and her illustration is so fun and playful; just looking at them brings out the inner-pirate in me. :)

I had permission from Sarah to use some images on my blog, are you excited to see what her booth looked like at the market?


So creative isn't she?

There are a bunch of other people who created all the amazing projects for her booth, and Sarah decided to do an ‘Out to Sea Blog Tour’!


I made a couple pillows, but today I am sharing a tutorial on how I made the Narwhal pillow.


{You will need}

A Couple different fabrics from the Out to Sea collection; for the center, sides, top & bottom of the of the pillow (wouldn't it be so cute to make this for a girl’s room too?)

21"x 21" fabric for back of the pillow

Blue fabric for the body of the Narwhal

White or Ivory fabric for the horn

DMC floss for the eyes, mouth, and stitches around the Narwhal. I chose the same navy color as the fabric

20"x 20"Pillow form or polyester fiber-fill to stuff the pillow yourself

Matching thread

{How To}

1. Cut the fabrics and set aside.


2. Prepare applique pieces.

To applique the Narwhal, you can use your favorite method. I did the freezer paper (you can find it at a lot of the grocery stores) method for this one and I will share what I did.

First, Download PDF for the Narwhal (I printed mine out a bit larger, you are free to modify however you wish). Because the image will be the opposite (mirror image) when you trace it, you need to trace the image on the back of the paper. It will be much easier if you have a light box, if not, tape the paper on the glass, and then trace the Narwhal. Basically you have 1 piece of paper, and on both sides, you will have the Narwhal, but you will use the one you traced by hand, so when it's all finished, the Narwhal is facing left. Well, if you don't really care, which way he is facing you don't need to worry about this step. :)


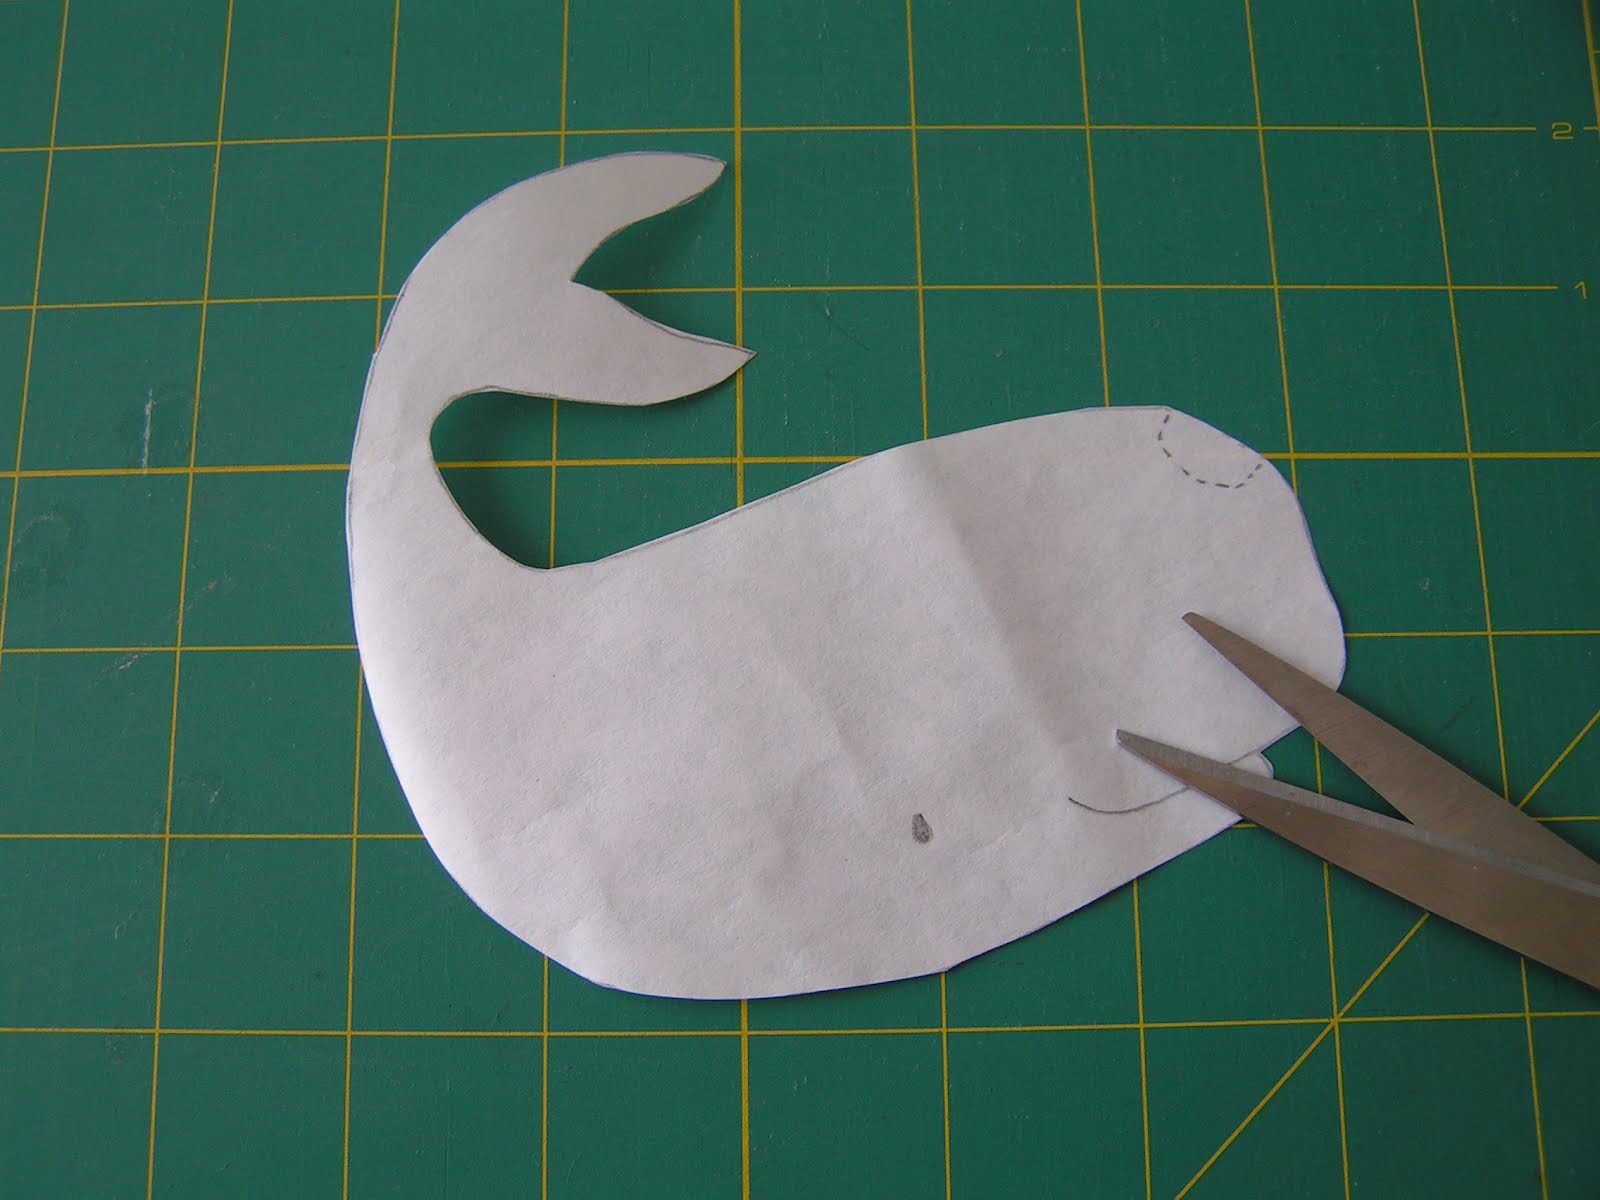
Second, keep the Narwhal paper on the window (or light box) and layer a piece of freezer paper on top, shiny side down, then trace his body and horn separately. Cut out the shape.


Third, place the freezer paper shape on the wrong side of the fabric shiny side down. Gently press the shaper to the fabric with a dry hot iron. Cut around the shape leaving 3/8" seam allowance. Make some clips into the seam allowance; such as around curves and indented areas for a clean finish.


Press the seam allowance with a hot dry iron towards the freezer paper.


Make the horn applique piece the same way.

3. Pin the Narwhal onto the center fabric. I pinned him slightly off to the right side, so when I add the long horn later, it is still equal spacing on both sides of the Narwhal. Applique the Narwhal using blind stitches.


4. After you are done stitching, cut away the background fabric and pull out the freezer paper.

Applique the horn same way.


5. I added a thin layer of quilt batting (I used 80/20) on the back of the appliqued fabric. Because I was going to stitch around the Narwhal, I wanted to give some texture to it.


6. Using 3 strands of DMC floss stitch the eye, mouth, and lines on the horn. Then, using 6 strands of floss stitch all around the Narwhal, gently press with and iron.


7. Sew side pieces to the appliqued fabric. Press with an iron. Then, add the top and the bottom pieces to the appliqued piece; again, press with an iron.


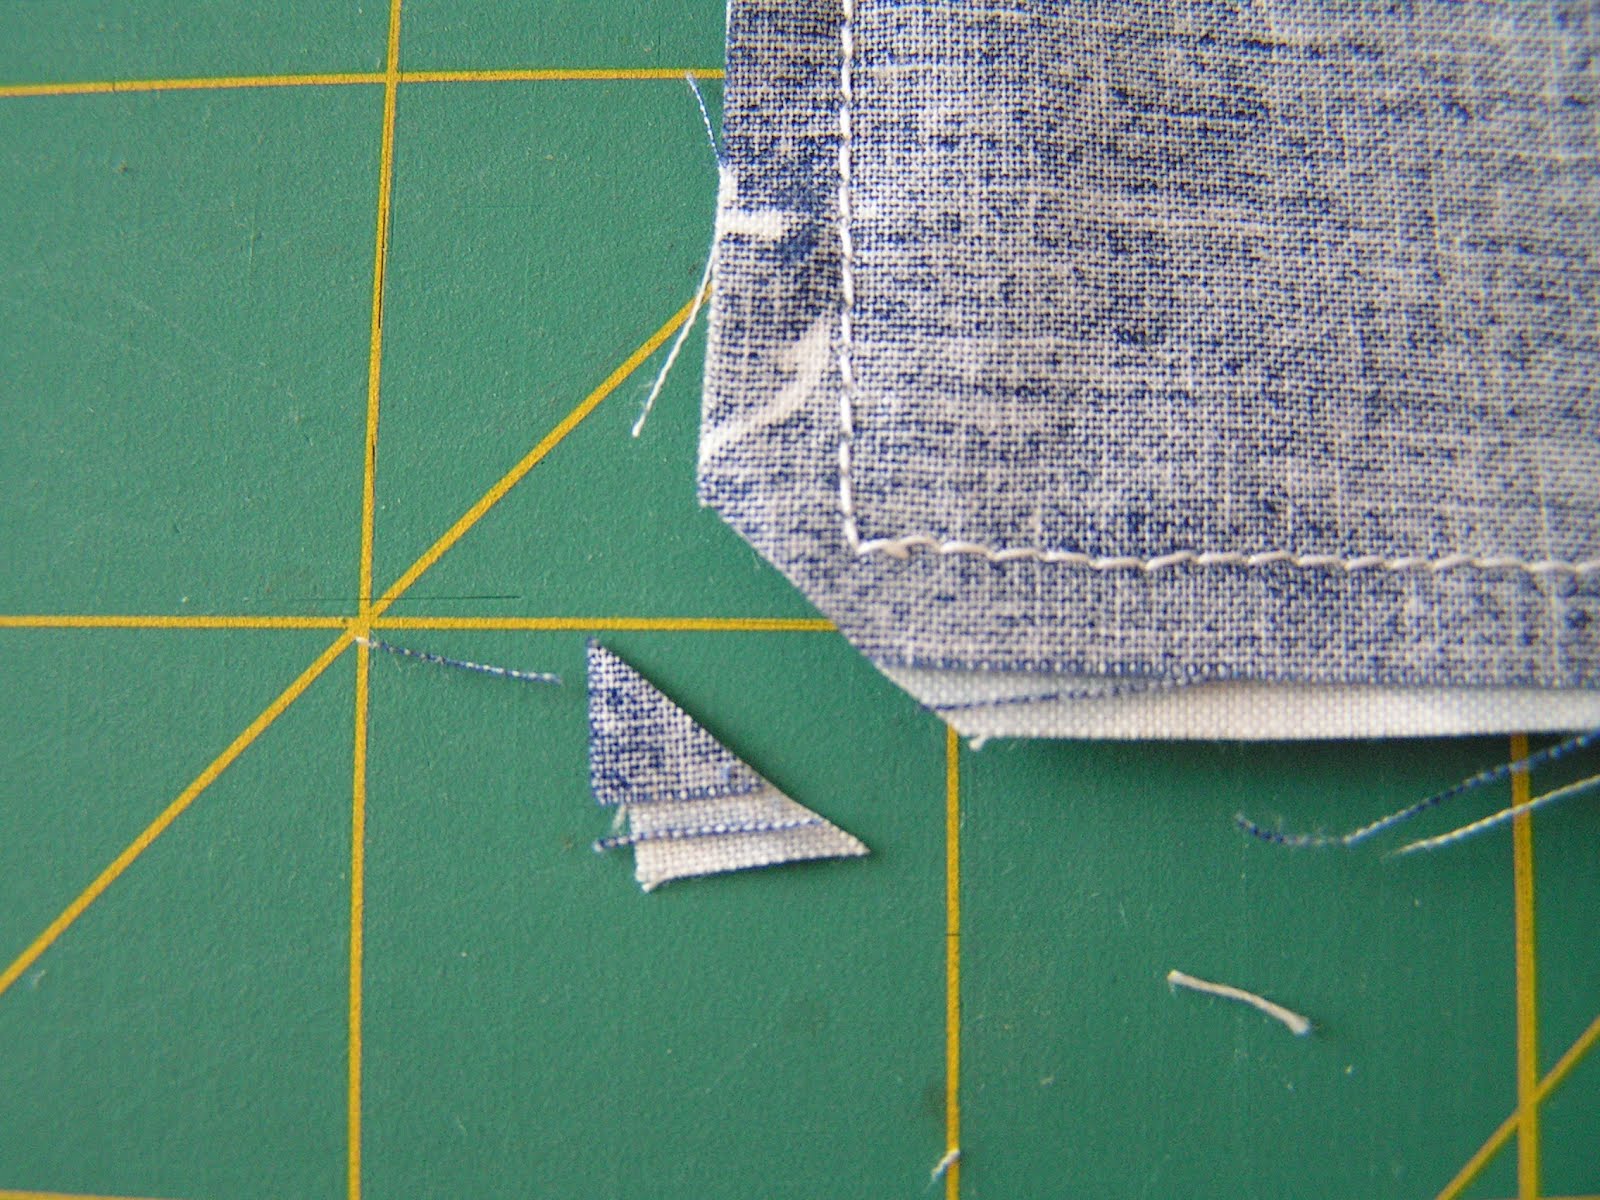
8. Put together the back fabric and front fabric right sides together and pin. Leaving about 5" for opening on the bottom seam sew all around it. Snip off the four corners.


9. Turn the fabric inside out. Press with an iron. Stuff and close the opening with slip stitch. Time to enjoy!


I couldn't go to the Market this year, but the pillow was accompanied by an adorable looking pirate and looked like this at the booth...


I hope you enjoyed my tutorial. A big thanks to Sarah for letting me be a part of this!

Make sure to check out Sarah's blog every Wednesday for more "Out to Sea" blog tour projects. So many fun tutorials are waiting to be revealed!

Monday, July 23, 2012

EVO Pictures

I have friends that I hold close to my heart, but since we are all busy it is SO hard to get together. We really have to set a date, mark the calender and make arrangement to make it happen. This week, I am going to meet up with several of them here and there and even thinking about it makes me smile. I think it is really important to stay in touch with friends... don't you agree?

Talk about staying touch... I have met many awesome people at EVO, and I would love to stay in touch with them. I didn't have many pictures, and some of them were blurry, but I will share some of them with you.

With Jen, and Jamielyn. Jen was one of my roommates, and I worked with Jamielyn before but met her for the first time. Such a fun girls!


I went to the sponsors' suites, and in Disney's room I met Micky!


Kiirsten, and Tara from The Dating Divas, they were such sweethearts, not to mention so gorgeous!


and, the last picture is with Laurie from Tip Junkie. It was such a treat to meet her in person.


I met a lot more amazing women, but like I said, I wasn't really good at taking lots of pictures. (If you have any, please send them my way!)

I learned a lot, and had an amazing time at EVO, but near the end I was missing my family.

Tired and ready to crash, I walked in to the house to Nerf gun bullets and toys everywhere, usually I would be yelling "clean up your toys!". As I was greeted by lots of kisses and hugs, somehow the mess didn't bother me... because I knew I was home. :)

Friday, July 20, 2012

It's Live! / Refashion It!

Hey everyone, do you remember that I told you about my filming experience with Megan from Brassy Apple on her new show on the Craft Channel?


Guess what. It is ready to view today!

I shared how to make my ruffle shirt. I shared the tutorial on my blog but this is the first time ever that I am in front of a camera! You can probably tell I was nervous during the filming... and oh, my English! I watched the show once and I was dying!

But, you know, Megan was an amazing host and guided me through the whole thing. So thank you Megan, You are amazing!! Please go check out my episode at Refashion It! She has lined up an awesome list of guests, so keep checking her channel.

Because I was SO nervous, I actually skipped a couple of things that I wanted to share on the show...

1. Remember that when you are looking for the same t-shirt THEY DON'T HAVE TO BE THE SAME SIZE. I realized that myself one day. You just need one shirt that's your size, and the other one to make ruffles can be a different size. When you are looking for a good deals, you kind of have to be flexible.;)

2. When you are pinning the ruffles to the shirt, it might be helpful to have thin cardboard in the t-shirt, so you don't pin through the front and back layers.

Well, that ends my 15 minutes of fame. See you all later. :)

Wednesday, July 18, 2012

Vitality Wins!

Just before I went to EVO there is something I started to do...


Have you heard of Vitality Wins!? It is a Total Health Game, including all the best strategies for losing weight and improving health. It is a game that you play by yourself or with your friends.

The games run for 8 weeks. There are weekly awards as well as game winners. However, everyone earns achievement badges and tokens. Tokens are used to play other games on the website.

Vitality started as a pen and paper game 10 years ago and was freely passed between friends via email. Vitality is now available online; it is fast & easy to play! You just click on the game boxes and enter what you did today. You get points for the good & healthy things you do each day. That's it!

I heard that you wake up at about week 4 and realize you feel so much better! You have lost weight, but it doesn’t feel like a diet because you are just having fun competing with your friends!

To tell you the truth, I was bit nervous about starting the progrum. I was thinking that "well, I can't do much cardio because of my leg, what do I do", or "Ugh, do I have to weigh and count all my caloric intake like some other weight loss programs?" You know, once I chose my level and started, I quickly realized how easy it is! I just enter what I did that day when I check my email before I go to bed that night. There are 7 different levels to choose from, so I can play the game at my own pace, eventhough I am playing with my friends.

Because I don't feel like I am pushing myself hard or anything, I don't know if I will lose 10 lb of pregnancy weight (well, it's been 7 years since my last baby, so maybe I shouldn't call it that) or not, but I am definately paying more attention to what I eat and to what I do. That alone is a good thing, right?

I am actually playing with my 5 other roommates from EVO. We are only on week 2, it will be interesting to see who the big winner will be! Bring it girlfriends!!

A big thanks to Maria & Royce Richards who are the founders of Vitality Wins!. They provided the wonderful room for us during the EVO conference. Thank you so much!

Read their journey on how they started Vitality Wins!, it is very interesting.

Sunday, July 15, 2012

Home from EVO and Lowe's Designer's Challenge

Hi everyone, I am back from EVO. Some people asked me what EVO is... Basically, it is a social media conference. I have never been to any type of conference before, but it was a great experience. There were somethings that I wish were different, but over all, I learned a lot, and met and mingled with many great people.

I don't have a whole lot of pictures, but I will post them in a separate post. One of the activities I attended was a hands on activity by Lowe's. It was Lowe's "Designer's Challenge". It was a totally new experience for me. Near the end, we were a bit stressed out, but it was a lot's of fun!


At 9 a.m. ET on Friday, July 20 the THREE TEAMS with the most LIKES will win Lowe’s Gift Cards!! Each member of the winning team will receive a $100 gift card, second place will win $50 cards and third will receive $25 gift cards.

Please help our team win the challenge by going to Facebook and "like" our project!

Little rant: There were some people left mean comments on Facebook about our project. Fortunately I haven't really dealt with negative comments before, this was a bit surprising for me. Seriously, "If you don't have anything nice to say, don't say anything" doesn't apply anymore? What do you think?

Thursday, July 12, 2012

Off I go

I am off to EVO today! I am really excited and somewhat anxious...

Along with other things, I packed small gifts for my roomies. I hope they will like them (and me :) ).

I will let you know about my adventure at EVO when I get back.

Talk to you soon!

Tuesday, July 10, 2012

Newbie ~ Sew a Straight Line~

Check it out. My 6 year old’s first sewing project...

She has been wanting to learn how to use a sewing machine for a while now. While I was deciding on some fabrics for a new quilt, she pulled out her "Hello Kitty" toy sewing machine and set up her "working" space. She had problems with the machine, and asked for help, I tried to help her... and I got so frustrated with it. (Ugh! Useless piece of junk!) I declared, "That's it! Rachel, you are learning on a real sewing machine."

When I pulled out my old machine (which is still in good condition and I keep it as a backup or for the kids to use). She was SO excited. I didn't have a sewing machine till I was much older, she is so lucky! I said, "Now, you need to learn how to thread the machine, because I can't come running every 5 second to rethread it for you."

Sounds mean? No, it's called tough love. I was trying to teach her a skill. :)

Surprisingly, she was really attentive; I could tell she was ready to learn. After practicing a couple times, I gave her some scraps to start practicing.

Very lightly she stepped on the foot pedal and the machine start making noise. Sewing noise...

Boy, she squealed when she first saw the stitches she created. That sparkle in her eyes was coming from the sheer joy of learning something new.

I was wondering to myself if I was like that when I was little and started sewing?

I gave her a permission to go through my precious scrap bins and pull out the ones she liked. While I was busy working around the house she took a looong time to going through the scraps, and started laying them on the floor. It looked like she is trying to create some kind of design and it got bigger... and bigger.

I asked her what she is doing, and she said "I wanna make a quilt like this", and pulled out one of the quilts that I made for her doll. I said, "Oh that would be bit hard for you still. Let’s start from something smaller."

I finally persuaded her to make a pin cushion. I scribbled a random design. Then she took the pencil and showed me what's in her mind...

OK... I love her ambition but I wanted to make it really simple, so she wouldn’t get sick of sewing on her first attempt.

She finally narrowed her favorite five fabric pieces. So, I did the cutting and step by step, I taught her what to do. I enjoyed the experience a lot, but I am not going to lie, there were so many times that I just wanted to rip the project from her hands and just finished it up! It took f.o.r.e.v.e.r...

But, you know what? She did it. After turning the little pincushion inside out, she stuffed it, and even did hand stitching to close the opening. She got frustrated a few times but I am so proud of her… she didn't quit. Those stitches are a work of love.

Not bad for a newbie, don't you agree?

She loved sewing with me, in fact, right after she finished the pincushion, she said, "That was fun! What should I make next mommy?"

Too bad, it was the time for me to go in to the kitchen, so I can feed the other hungry kids.

Although, I did promise her that we would sew together after I get back from my weekend away. :) How awesome it would be, if she has found something she can enjoy the rest of her life, and it happens to be something I love to do as well.


Monday, July 9, 2012

Canvascorp Projects

It is less than a week till evo, since this is my first time attending, I am not really sure what to expect, but I am really looking forward to it. One thing I know though...I think I am going to have awesome roommates! Not only one or two, it will going to be 7 of us. I have actually met in person only one person from the group, but I have great feeling that it is going to be so fun to get to know them.

One of the girl Jennie from Craft O Maniac has Canvascorp as one of her sponsor, and they sent all her roommates such a fun package, check out these awesome goodies...


It's not my birthday or Christmas, but it's such a thrill to open up a package to find out what's in it. Canvascorp has such a fun products, my mind started racing right away to decide what to do with them!(with sqeel, of course). :)

Are you curious to see what I made so far?

First, I made headbands using the canvas flowers. The all turned out nicely, but my favorite is the top one. I just made fabric flower from my stash, and added a silver button. Rachel wore it several times, and it goes well with many different outfits.


Then, I moved on to the canvas bag...well, instead of decorate it to use it as a bag, I had cut off the handle...


Stamped canvas fringe...

and used canvas minis, fabric glue(by the way, I LOVE this glue!! I used this for my shoes refashion too), glimmer mist and such and made a decortive pillow!


The last picture is for those of you who are wonderfing what I did with the handle I cut off from the bag...

I made a belt. I simply added lace to the handle, big sew-on snap and canvas flower.

I am thinking to use canvas mini's to make vanner for Thanksgiving, but since I have other projcets lined up, it has to wait for a bit. I will share the pictures when I am done though. :)

My big thanks for the Canvascorp for the faburous package, I had so much fun!


Friday, July 6, 2012

Skirting the Issue

I am guest posting today at Simple Simon & Co today for their "Skirting the Issue" event.

Simple Simon and Co


What is skirting the issue? Liz and Elizabeth from Simple Simon & Co have lined up free skirt sewing tutorials by various sewing bloggers for the month of July to make and donate handmade skirts to girls in Foster Care.

They have teamed up with the local Foster Care Agency, Utah Foster Care Foundation and trying to meet their goal of 100 skirts donated by the first week of August.

I love blogging, and I have so much fun sharing sewing/crafting ideas that pop in my head with you all. It is even more rewording though, if what I do can bless someone’s life even in a small way. So I am thankful for this opportunity to participate in this event.:)

I came up with a Ribbon Belt Skirt tutorial.

Interested? Head over to Simple Simon & Co to see the tutorial. You might wanna whip up a couple this weekend.
Blog Widget by LinkWithin